Here’s a homemade holiday gift from the garden that there is still time to make. It took me about an hour and a half to make the caramel slab and I’ll probably be cutting and packaging individual caramels until the second coming, but it will have been worth it. To say that these are gorgeous and addictive is an understatement. The best way to savour them is to put one in your mouth and let it melt slowly. They’re buttery, sweet, and salty with just enough lavender and a taste of honey. I can’t get these packaged, wrapped, and out of here fast enough because I CAN’T STOP EATING THEM.
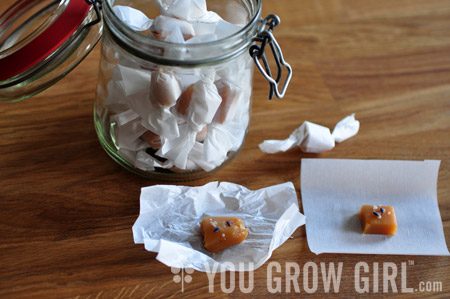
I knew I wanted to make caramels as a holiday gift this year, but I wanted mine to have a twist. Few people respect lavender as a culinary ingredient — they don’t know what they are missing. I should claim a few converts from these. I made these following a recipe that I found over here, but I made some notable changes to the ingredients and the preparation method that I will list below. Please note that this recipe makes a very large slab of caramel. The jar in my photo is depicted with 25 individually wrapped, generously portioned caramels. Making that batch barely cut into the total amount. I expect to have packaged up a few hundred by the time I am done, barring that I do not eat too many in the process!

Packaging:
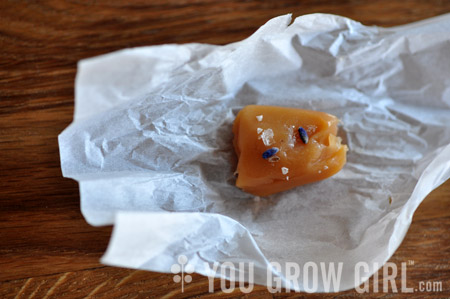
I didn’t want to be wasteful with my time or resources so I decided to go for something simple and quick. Packaging is the biggest part of the task and I didn’t want to waste a lot of time making each one overly precious. I used parchment paper cut into small squares that I then twisted around each small treasure. I have played around with garnishing each caramel with beautiful finishing salts and a few dried lavender buds. I’m undecided on the lavender buds but the salts take these to another level. I have a bit of a thing for salt so I already had a wide assortment on hand. I have experimented with three types that were in my pantry: the grey sea salt that I normally cook with, Alaska Smoked (a yummy, smoky, flaked sea salt), and Murray River Australia Pink Flake Salt (our go-to finishing salt, especially for salads). [BTW: The Alaska Smoked salt link sends you to The Meadow, a sweet little shop I happened upon while walking through the West Village in New York City this summer. They also sell flowers, chocolates, and bitters. You’d like it.]
In the future, I am thinking about substituting the lavender for another favourite edible flower, rose petals. I’d also like to try it with some of the interesting peppercorns I have collected.
To send these off as gifts I am packaging them into canning jars. I collect gasket tops like the one depicted from thrift stores, but regular canning jars will work too. You can go even fancier (but also pricier) with Weck. Tonight I will be making up labels with the ingredients so recipients know what they are eating. I’m still working out any additional decorative details like ribbons, strings, or fabric.
Notes on Ingredient Changes and Methods:
– I used all organic ingredients: milk, butter, cream, honey… the lot. These caramels would cost a fortune to buy in a store. I’m guessing that my total cost based on quantities used and without packaging was far less than $10.00, probably closer to $5.00.
– I used dried ‘Hidcote’ lavender buds to make this. It’s a very sweet and aromatic variety that is very flavourful in baked goods. It also happens to be small, compact, and great for growing in small spaces. Harvest the flowers before the buds open and hang to dry.
– I decided against adding the vanilla extract because I did not want to mask the lavender flavour. At the last second I had a change of heart and added a few drops, but I’m not sure I should have bothered.
– Part of the success in cooking caramels is in allowing the ingredients to caramelize, developing both flavour and colour slowly. Keep the temperature around medium and be patient with it. I found that it took longer than the recipe suggested but it was worth the wait. It will get there.
– I originally poured this into a well-greased pan as the recipe suggested but it was a nightmare to get the caramel slab out of it. In the future I will simply pour the thick caramel onto a baking sheet lined with a Silpat. I had originally intended to do that but had other projects on the go simultaneously that were using up the pans.
– Make sure that the slab is cold from the fridge before slicing. This makes it easier. I used a metal dough scraper to cut mine rather than a knife.
These sound amazing. I know what I will be doing this weekend now :)
great idea! I’ll have to try to find some time to cook these up! Thanks!
My caramels stuck too, so I bought nonstick aluminum foil and it worked perfectly.
I saw these on your Instagram feed and had to try them… So freaking good! Thanks so much for sharing!
I didn’t realize how much fun I would have making these tasty treats…. The down side is wrapping each piece one by one…. i most of ate 20 pieces myself!!!
I love these and couldn’t stop eating them either. Most everyone I gave them to as Christmas presents also enjoyed them. They’re easy to make too! Hints: they last longer in the fridge and won’t stick if you cover the baking sheet with parchment paper.