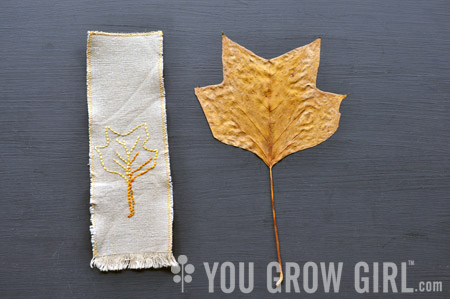
I needed a bookmark, so I made one. Random scraps of paper and bus transfers do the work of marking my place in a book, but they are not special. They just are.
I knew it had to be botanical, because… exhibit a thru z… and it was a pressed leaf that provided the inspiration. I often slip leaves into books only to discover them months or years later. This is why I always flip through the pages before I get rid of a book. They sometimes hold more secrets beyond the words that are written inside.
In this case it was a leaf from a tulip tree leaf (Liriodendron tulipifera) that I picked up on a walk last fall. The tulip tree is a North Eastern native that is gaining popularity around here. The leaves are simple and elegant and they turn a beautiful golden yellow in the fall. I find I want to take them all home.
Notes:
I stitched my bookmark onto a piece of scrap cotton. It is 2″ X 6″ but I realize in hindsight that 8″ would have been a nicer length. The leaf was yellow when I put it into the book but had browned with age. I used variegated thread to represent this colour shift, but any solid colour will work, too.

You Will Need:
- A small piece of heavy cotton or linen cut to 2″ X 8″
- 1 spool sewing machine thread (I used golden mustard)
- Leaf pattern (See below.)
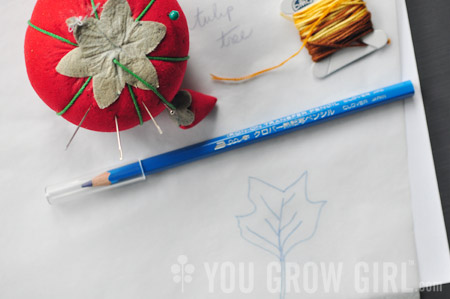
- Iron-on transfer pencil
- Tracing paper
- 1 skein # 111 DMC variegated mustard, six strand embroidery floss
- 1 embroidery needle (available at any craft store)

How To Make This:
To make the fringe at the bottom of my bookmark, I simply used my embroidery needle to pull out horizontal threads. This is easily done with a heavy, open-weave fabric.
To prevent the rest of the bookmark from fraying, sew a zig zag stitch around the top and sides of your bookmark. Sew the bottom too if you do not want fringe. I did not have a thread colour on hand that matched my fabric, so I chose a golden mustard that matched the leaf pattern.
Print out the pattern I have provided or draw your own. I transferred the drawing onto my fabric by tracing it onto tracing paper, using an iron-on transfer pencil (these are brilliant). For this reason, I have posted the pattern flipped so that it will transfer correctly.
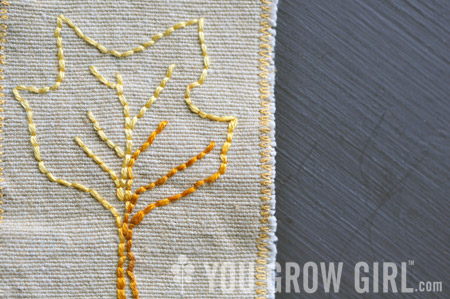
Cut a 12″ or so length of floss and separate the threads in half so that you are working with 3 strands. Thread your needle and you’re ready to roll. BTW: I recently discovered this needle threader by Clover and now I don’t know how I lived without it. Sweet relief for my weary eyes.
Stitch along the lines of the pattern using a back stitch (there is an excellent video tutorial here). I used this stitch because the iron-on pencil I am using is permanent and the back stitch covers it all up perfectly. Secure your stitches and you’re done.
Please come back and share your bookmark with us here!
lovely!
very nice, I need to get back to doing some stitching, been doing lots of knit and crochet work
Nice idea, I will try to do one too! The tulip tree leaf is lovely, but then again there are so many nice ones to choose from. I might go for a ginkgo…
Oh yes, gingkos are another fave. Such gorgeous shapes.
Really nice! Thanks for the back stitch link. I used to do embroidery, but haven’t for many years. Forgot the stitches, too. Your story rekindled my desire to stitch again. Love your website.
That’s great! I’m on a huge stitching kick right now.