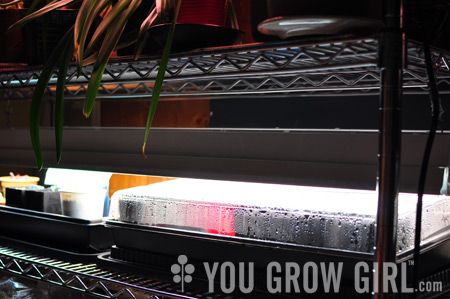
When we moved, I abandoned the cobbled together grow light setup I had been struggling with for years in favour of beginning again with a much improved, bigger and badder system.
In the old place I had to stuff the grow light shelving system into a corner nook of my office. Consequently, it couldn’t be more than 2ft wide. Have you ever tried to buy a shop light that is only 2 feet wide? Good luck. Yes, they are available, but they are built in a boxy shape and are meant to be wired in as under-cabinet lighting. I had to do a bit of precarious electrical wiring in order to attached a plugin cord to my lights. Because they were mounted and stationary, I had to lift my seedlings up to receive the necessary amount of distance between them and the bulbs as they grew. This meant regularly adding and subtracting stacks of books that I had placed underneath flimsy trays that wobbled and spilled liquid whenever they were shifted.
As you can imagine, this method did not always work out well for the books.
And then there was the shape of the shop light boxes themselves. Boxy shapes with sides that come down straight don’t reflect light well. I made due, but the set up was what it was. At the time I was happy to take what I could get.
So when we moved I abandoned that mess of wires and spare parts with the dream of something less ramshackle in mind. And then… work, life, moving, stuff. Finally, it all came to a head during the Holidays when the unheated front porch froze and several plants that should not have been out there but had no where else to go, froze. I needed a lighting system stat.
Here’s what I built.
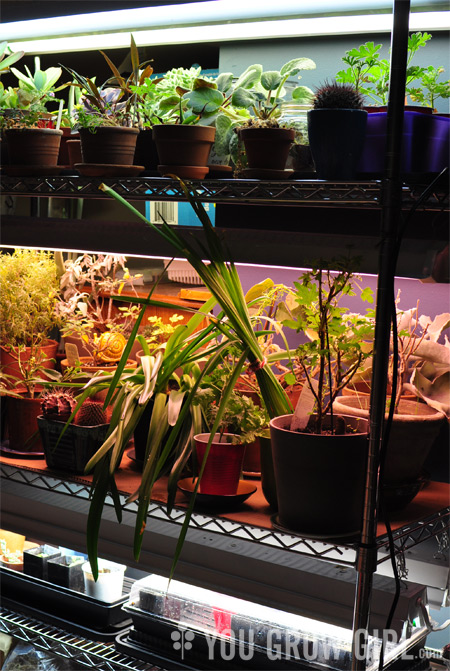
Here you can see the cardboard lining on the middle shelf and the boot trays underneath the seedling trays. The seedling pots are in a sealed tray to avoid spilling liquid onto the electrical heating mats.
D.I.Y Lighting System for Overwintering Tropical Plants and Starting Spring Seedlings
I built this set up with the average person in mind. My goal was to make a light system that is affordable, using materials that anyone can find without placing an order for special, hard to find bulbs, or parts. Everything is standard sized and can be purchased at a hardware store or DIY centre.
The trick of course is getting it home. As a non-driver who lives in an urban centre, I am sensitive to the difficulty purchasing garden materials can present. So many items are only available from far away locals and are often too large to fit into a cab. Unfortunately, this system is large. It will not fit into a small apartment and it would be extremely difficult, if not impossible to get this home without a vehicle. The shelving until did not fit into the trunk of a small rental, but it did fit into the backseat.
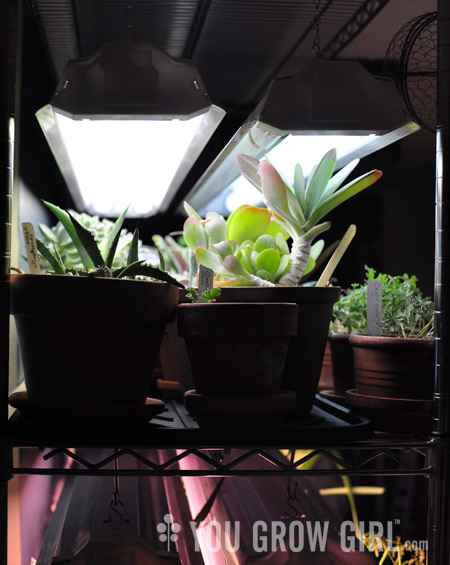
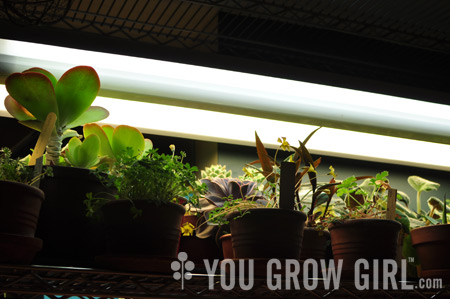
Here you can see the $2 boot trays used as drip trays and the curved sides of the light boxes (these reflect light better than the straight-sided boxes). You can also see the small and large S hooks used to hang them.
The Shelves
The first thing I did was buy a new shelving unit. My goal was to find one that was wide enough to fit an inexpensive, standard-sized shop light (4 feet). I wanted it to be metal because my last shelving unit was wood, and the heat created by the lighting, in addition to my precarious, amateur wiring job had left me feeling a bit nervous. The unit I bought is a 4 foot wide, metal shelf, often used in restaurants. It comes with casters, which are handy if you need to move the unit around for some reason. It normally costs about $150, but I recently found it on sale for $99.
The shelves are adjustable. As a result, I was able to leave one of the shelves off entirely so I could devote more space to the others and vary their heights depending on usage.
- The bottom shelf is for storage of tools, watering can, and other supplies.
- The top two shelves are higher because I am using them for tall, mature tropical plants.
- The remaining shelf is shorter. I am using it for seed starting. I kept it shorter because the seedlings will only stay there for a short period of time. Most of them will move up to one of the higher selves and eventually outdoors.
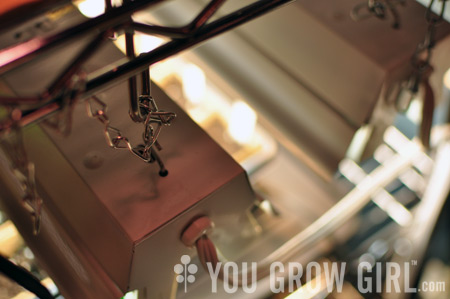
The Light Boxes
- I acquired 6 cheap, 4 foot-long shop light boxes that come with adjustable chains so you can lower or raise them easily as the plants grow. No more book towers! They have slightly angled sides that reflect light outward.
I used two boxes per shelf. The shelves are wide and I wanted to be sure all of the plants received an equal amount of light. Fortunately, I did not have to buy all of the lights as my friend Barry gifted me three. The three I did purchase cost $17 each.
- These are the boxes I bought, unfortunately, the price is currently marked up.
- I had to purchase several small S hooks so that I could hang the units from the shelves ($3).
The Bulbs
I needed a lot of bulbs, 12 in all. I bought:
- 8 full spectrum “Aquarium and Plant” bulbs for the mature plants that will be living on the top shelves through the winter months. They’re not the greatest bulbs out there, but they’re available everywhere and they don’t cost a bundle. I think mine were about $7 each. Really good bulbs tend to cost around $20 each.
- 4 regular fluorescent bulbs for the seedlings. 2 COOL WHITE and 2 WARM WHITE. I put one of each into each unit so that the differing light is evenly distributed. These are less expensive than the full spectrum bulbs (about $6-8 for 2 bulbs). Seedlings don’t require light in the full spectrum in their early days so you can get away with this cheaper option for seed starting. Note: I bought T8 bulbs. This is important to note when you buy your shop light. The new fixtures I purchased take T8, but the older fixtures that were gifted to me take T12 only.
Turning the Lights On and Off
Grow lights need to be on for a long time (12-16 hours), especially when you are growing seedlings. My old unit was on an analog timer, that had to be readjusted if the power went out.
- This time around I purchased a fancy digital timer that has its own internal battery, so if the power goes out it is business as usual. Mine cost about $20.
- All of the lights are plugged into a surge protector, and that is plugged into the timer so that they go on and off at the same time.
The heating mats (below) are plugged into a separate outlet because they need to stay on indefinitely.
Heating Mats
My basement is cold. This is good for some plants as they prefer cool, but not freezing temperatures through the winter months. Other plants prefer it warm. I have compromised by putting the plants that like it cool nearest to the door. The heat-loving plants are set on heating mats on the opposite side where there is less chance of a draft.
I applied the same conditions to the seed starting shelf since I am currently growing lithops seedlings that will be forced into premature dormancy if it gets too warm.
- Heat mats cost abut $20-30 each. I have 5 and some of them were purchased for peanuts at garage sales. They’re expensive, but so worth it if you are growing in a cold basement like I am. Still, they are not absolutely necessary. If you’re just starting out, this is the place to save a few bucks.
- I have this one, but here’s a similar but less expensive mat. I would also recommend a kit like this that includes a dome if you don’t have one already.
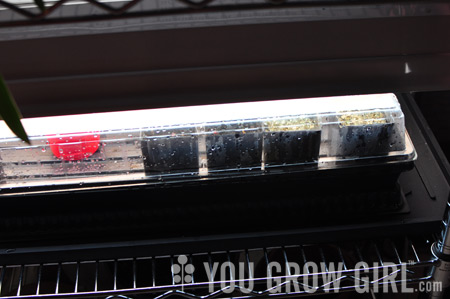
Here you can see the $2 boot trays I bought to keep the heating mats off of the metal shelving. You can see from the ridging inside that they double as a fantastic drip tray. The ridging props pots up above any excess water.
Lining the Shelves
- I lined the top two shelves with cardboard pieces cut from the box the shelves came in. I did this to avoid dripping water from the upper shelves and through the shop lights.
- I bought plastic winter boot trays for $2 each from the dollar store, and am using those as drip trays for some plants and a mat to create distance between the metal shelves and the heating mats. Heating mats aren’t supposed to touch metal. Two trays fit each shelf perfectly and the ridges inside keep the pots elevated above any water that leaks into the tray so they are never sitting in excess water. It’s brilliant!
Saving more money: They’re not as widely available, but I did find a sturdy metal shelving unit just like mine that was 4 feet wide but with less shelves. To do seedlings only, you could spare the cost of the other lights, especially the more expensive, full spectrum bulbs, and reduce it down to 2 shop lights. You can grow a reasonable number of seedlings underneath such a set up and still have space to store other gardening items.
I have almost the exactly same set up as you (minus the boot trays which is an awesome idea). Also I did not know that heating mats are not supposed to touch metal. My set up is also in the basement, in a bedroom sized room with the door shut. I’ve noticed a major temp difference between the lower shelves and the upper shelves, so I put the heat / dry loving ones at the top and keep the cool / need to be moist all the time ones at the bottom.
Also, due to excess humidity, I did manage to get a bad case of mildew growing on the walls inside the room where the pants were. This year I plan to either keep the room ventilated (either to the outside or to the rest of the basement) and/or add a dehumidifier (keeping an eye to ballance the plants need for humidity and my wall’s need for not being covered in mold).
there’s a picture of my setup on my blog here http://digityourself.blogspot.com/2010/04/seedling-update.html
or here OK i’ll shut up now. http://digityourself.blogspot.com/2010/02/let-seed-starting-begin.html
Thank you SO much for this most excellent post. I skimmed it quickly & will study it closely this coming weekend as I work on my own system.
I have smaller versions of this type of shelving — two units, 2 feet wide and three shelves each so I will put them end to end. It won’t be pretty but I think it will work.
Jessica: No wonder you have mold. That’s a HARDCORE set up!
I didn’t mention it, but I also have a little fan for circulation.
How timely! I’m just starting to set up my grow op for seedlings, and I’m re-vamping this season as well. I’ve just moved, so like you, I’ve decided to tweak my system for the better.
My overall set-up is very similar, and I built the design last year after reading and seeing inspirational photos on the YGG forums! The forum community is always bursting with great ideas. Thanks for the helpful advice!
Wow! Nice overview. Sounds similar to my seed starting setup. I have all my lights in the basement, so I can slop around as much water and soil as I want. In the past I had tried propping up my shop lights with books, bricks, drawers, etc. But the last couple years I’ve had them hung from the ceiling (SO MUCH more convenient for adjusting the height).
This looks sort of similar to what my fiance just made me from some wood ikea storage shelves. I’m excited to get started growing things.
I pretty much have the same set up too here, minus the heating mats. I also have a standing fan to strengthen my seedlings. I should get a timer and plug the power bar into it. One year I lined the back and sides with an emergency blanket to help keep the area warm however it got too warm and made my seedlings leggy.
I love my shelf!
THANK YOU!!!! I’ve decided that in the next two weeks or so, I’m going to put together a lighting system so I can start more veggies inside. This post is SO helpful. Seriously. Thank you for posting this. . . and boot trays! What a good idea. What a pretty collection of plants you have under there, too.
Thanks Ginger: Some of the plants are a little worse for wear… they were frozen in the unheated porch and shouldn’t have been! Thankfully they are making a comeback. Lots of new growth on bare stems.
Kathy: We have the same shelf. Thanks for the picture. I would have shown the whole thing but our basement is still piled with boxes… I couldn’t stand back far enough, even with a wide angle lens!
I’m so glad you posted this. I can’t invest in it right now but i’m definitely bookmarking this for a later investment.
I thought you needed special bulbs. i didn’t realize it was this easy.
I know you are crazy busy so this is awesome. thanks!
This looks great Gayla! I will definitely invest in one of these when I get back to the states.
I used to use the window before but the seedlings always get really long and lanky in comparison to what I get if I just wait for warm weather and plant them directly in the soil. This is good!
Gayla — Thank’s for suggesting the boot trays. I’ll be looking for those at the dollar store down the street.
Do you water seedlings from the bottom up or top down?
in my years of growing orchids under lights,,,,,,alternating cool and warm lights is just fine…..BUT you must purchase new bulbs each year as the spectrum deminishes. the lights are fine and could be donated to a community centre or someplace requiring florescent lights.
David and JessieGirl: The cool white and warm white bulbs are for seed starting. I bought the sort-of okay quality full spectrum bulbs for my mature plants. I’ll upgrade to better bulbs when I have the cash… or if I think they are needed. So far the plants seem happy with the lower quality bulbs.
Bill: I prefer to water from below until they’re older and there is less chance of damping off.
This is a great set up Gayla. I wouldn’t worry about purchasing expensive bulbs.
I wish I had this post 2 years ago when I was setting up my system! Here’s a short run-down of what I found and built:
-I bought a 5-shelf system at Walmart, $34 (not proud of that at all, but I’m in backwoods Wisconsin and there was nothing like it anywhere else). It has steel framing and thick plywood boards for the shelves.
-Four 48-inch shop lights, $60.
-This was before I knew better, so I bought the Agrosun grow light tubes for $140. As they burn out, I’ll replace them with the kind recommended here.
-Timer, extension cords, do-dads: $23.
Total set-up: $260. Still a lot less than the catalog versions, but would have been a lot less if I had known to buy other lights. This baby gets me through loooong winters! I love it.
Thank you for this incredibly detailed guide. I will come back to this…if I can ever get rid of enough stuff to make room in my tiny apartment for a DIY lighting system!
Ciao Gayla-
Excellent step-by-step instruction guide! Well done, girl! You’re ready to rock and roll now! Brilliant use of the winter boot tray as well. We also should upgrade our timer. It’s due.
What a timely post! I was about to run a search for a grow light set up. Thanks!
Thank you so much for posting this! I just finished your book and was so motivated to get started but hadn’t figured out exactly how I should set things up inside for the seeds. I even told my husband that the “stars had clearly aligned for me” because I was stalking websites for more info on the subject the day that you posted this. :)
We got our little set up started today. You can see pics & prices here:
http://jandjbackyardgarden.blogspot.com/
Hopefully we got appropriate equipment!
Julie & Valencia: That’s great! Good luck getting set up. You’ll have a lot of fun growing seedlings.
Thanks for posting such an awesome DIY project. It has inspired me to build one similar to your- I had the lights but was just raising them on books set at the end. I really needed to skeleton and your wire rack has hit the spot-just what I needed. I might just take the short cut and order thru Amazon, with free shipping and all, beats looking for and lugging home for sure.
I also love reading your posts!
Mary Ann K
You forgot to build a fence around it to protect it from cats and dogs! Oh, wait, that’s just my house. I can improvise a fence.
thank you so much for this break down! I was considering putting together a similar setup in my basement but had no idea where to start. this is the perfect guide for me.